Halflife Rally Level Design Tutorial - Intermediate |
||||||
Introduction |
||||||
| This is an interemdiate tutorial that should be followed after you have completed the basic tutorial. This will start where the basic tutorial finised. In this tutorial we are going to show you how to alter the height of you corner. | ||||||
|
Step 1 - Undoing our Subdivide |
||||||
| One thing that can be a bit annoying about this technique is that once you have subdivided your corner, it can be very very tedious to go an alter it again. So here is a very big tip that can save you a lot of frustration. When ever you have completed your vertex manipulation or finished altering the height of the corner, copy the whole thing and paste it. Then hide one of the copies. So now if you do make a mistake or dont quite like how it turned out you can go back to your other copy. Ok so select your corner, open the displacement tool and click the destroy button. With the displacement tool still open click the create button to create our displacements again, the right faces should already be selected so just go ahead and click ok Ok so now we are back 1 step from the basic tutorial. |
||||||
|
Step 2 - Altering the Height |
||||||
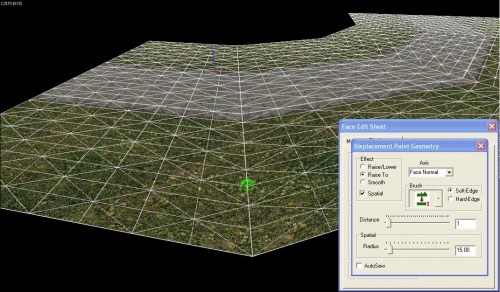
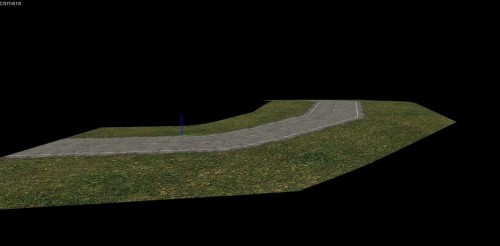
| Select our corner and open up the displacement tool. Open up the paint geometry toolbox and select the 'Raise to' option, select a brush size of about 15 and set the distance to 1. Now like in the image, determine where you would like your corner to start rising, and click along that row, so each vertex will be raised to a height of 1.
Now in the displacement window change the distance to 3, move along one row of vertex and raise them as well. Then you continue this process say by setting the distance to 7, raise another row, change the distance to 15, raise another row etc. By doing it this way you get a nice steady incline. The more of a steady incline you want the less you raise the distance between each row of vertexes.
|
||||||
|
Step 3 - Finishing up |
||||||
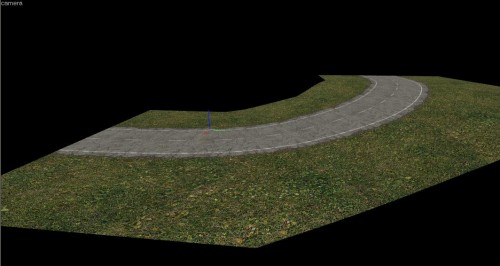
| There is now only 1 more thing to do. Select the whole of your corner, open up the displacement editing tool and click the subdivide button. You will magically see your corner turn from something pretty average to a beautiful smooth corner
|
||||||